


Getting Your Watering Right: How to Use a Moisture Meter

Two of the most common mistakes people make with their gardens are overwatering and underwatering their plants.
Both practices put plants at risk. And both mistakes can be prevented.
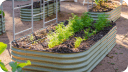
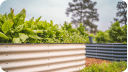
When it comes to watering your plants, the key to striking the right balance is irrigating based on need, not a schedule. In most cases, you shouldn’t water unless your garden’s soil is dry about six to eight inches below the surface. And when your soil is dry, you need to give it a good soaking so the water can be absorbed down where your plants’ roots are.
You can check soil moisture by sticking your finger in the soil, but not everyone wants to do that on a regular basis. This is where a moisture meter can help you.

This handy tool, also known as a hygrometer, measures the amount of moisture in the soil so you can tell if your plants are getting too much, too little, or just the right amount of water.
Simple and effective
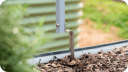
With a moisture meter, instead of putting your finger in the soil, you gently push a metal probe into the dirt near your plants.
Most meters use electrical resistance to measure moisture. Wet soil conducts electricity better than dry soil. So, when the soil is wet, it will allow more electricity to pass through, and the meter will show a higher moisture level.
Generally, these tools are reliable and effective, though there are factors that can impact their accuracy. Take soil types: Clay soils tend to hold more moisture and may show different readings than sandy soils under similar conditions. That doesn’t have to be a problem though. Depending on the type of meter you have, you probably will be able to calibrate it for your specific soil type.
We should mention that even if you don’t need to adjust your meter for a soil type, these tools need regular calibrations to remain accurate. Some are calibrated manually, while others are calibrated automatically. Check your instruction manuals or the manufacturer’s website.
In addition to regular adjustments, keeping your meter clean and storing it properly will significantly affect its performance and longevity, too. Dirt or moisture on the probe can interfere with accurate readings. Again, the instructions that come with the meter should have details.
Choosing the right meter

Moisture meters fall into two categories: analog and digital. Analog meters are simpler and can be very durable.
Meters with a digital display tend to be a bit more precise, and some offer information in addition to soil moisture levels like temperature and pH levels.
As you start researching meters on the market, you’ll see that some are designed for a greater depth of measurement, which can be helpful if you want to monitor the moisture of the soil surrounding your trees or other deep-rooted plants.
Your step-by-step guide
If you’re worried that using a probe will be complicated, don’t. It’s a straightforward process. Here are some basic guidelines.
Taking measurements: Gently insert your meter’s probe vertically into the soil. You want to prevent hard strikes against rocks, which could damage it. Aim to get as close to plant roots as possible without harming them. The probe should be inserted about two-thirds of the way down into the root zone for most plants. For potted plants, you want to push the probe deep enough to measure at the root level but not so deep that it hits the bottom of the pot.
Read the moisture level: After inserting the probe, wait a few seconds for the meter to stabilize. Read the moisture level on the scale provided. Digital meters will display a number, often from 1 (dry) to 10 (wet), while analog meters will typically use a dial.
Interpret the readings: Learn what the readings mean. Most meters come with a general guide, but moisture needs can vary among different types of plants. For example, cacti and succulents need to dry out completely between waterings, while ferns and cyclamen prefer consistently moist soil. You can find information about the specific needs of your plants online or on seed packets/plant labels.
Check multiple locations: Soil moisture can vary, especially in larger beds. Check different areas around the plants and at various depths to get a comprehensive understanding of the water distribution in the soil.
Regular monitoring: Use your meter regularly to monitor the soil. You’ll find this especially helpful during extreme weather conditions like prolonged dry spells, intense heat, or after heavy rainfall.
Adjust your watering based on readings: With help from your meter, you’ll know when it’s actually necessary to water your plants.
Keep it clean: Don’t leave your meter’s probe in the soil; that can lead to damage. After use, remove soil and debris from the probe with a damp cloth, but don’t get water on the meter itself. Store your meter in a dry place.
Consider your meter a guide
While moisture meters can be extremely helpful, they should be used as a guide, not an absolute authority, when it comes to watering decisions.
You should also factor in your plants’ appearance (are the leaves wilted?), weather conditions, and your experience when you’re deciding whether to irrigate.


Leave a comment